

Hey there! If you're looking to spruce up your outdoor space and need a snow - resistant pergola on a stone surface, you've come to the right place. I'm a supplier of snow - resistant pergolas, and I'm here to walk you through the installation process.
Pre - installation Preparation
First things first, you need to pick the right spot. Look for an area on your stone surface that gets enough sunlight if you want to use it for relaxation or dining. Also, make sure it's a flat area. Uneven stone can cause problems during the installation and might lead to an unstable pergola.
Measure the area where you plan to install the pergola. Get a measuring tape and note down the length and width. This will help you choose the right size of the pergola. We offer a variety of sizes, so you can find one that fits your space perfectly.
Check the stone surface for any cracks or loose stones. If you find any, it's a good idea to fix them before starting the installation. Loose stones can make it difficult to secure the pergola, and cracks might expand over time due to the weight of the structure.
Tools and Materials You'll Need
Before you start, gather all the necessary tools and materials. You'll need a drill with the right bits for drilling into stone, a level to make sure the pergola is straight, a wrench set for tightening bolts, and a ladder for reaching higher parts of the structure.
As for materials, besides the pergola kit itself, you'll need stone anchors. These are essential for attaching the pergola to the stone surface. Make sure to choose high - quality anchors that can withstand the weight of the pergola and the snow load.
Unpacking and Inspecting the Pergola Kit
Once you have everything ready, unpack the pergola kit. Take your time to inspect all the parts. Look for any signs of damage, like dents or scratches. If you find any damaged parts, contact us right away. We'll make sure to send you replacements as soon as possible.
Lay out all the parts on the ground near the installation area. This will help you get an idea of how the pergola is assembled and make it easier to find the parts you need during the installation.
Marking the Anchor Points
Use a pencil or chalk to mark the locations where you'll drill the holes for the stone anchors on the stone surface. Refer to the installation manual that comes with the pergola kit. It usually has a diagram showing the exact positions of the anchor points.
Make sure the marks are clear and accurate. Double - check the measurements to ensure that the pergola will be centered and level.
Drilling the Holes
Now it's time to drill the holes for the stone anchors. Put on safety goggles and a dust mask to protect yourself from the dust. Use the appropriate drill bit for your stone type. Different stones, like granite or limestone, might require different drill bits.
Drill the holes to the recommended depth as specified in the installation manual. Go slowly and steadily to avoid cracking the stone. After drilling each hole, clean it out with a brush to remove any dust or debris.
Installing the Stone Anchors
Insert the stone anchors into the drilled holes. Make sure they fit snugly. Use a hammer to gently tap the anchors into place if needed. The anchors should be firmly seated in the holes to provide a strong foundation for the pergola.
Assembling the Pergola
Start assembling the pergola according to the instructions in the manual. Usually, you'll begin by attaching the posts to the base plates. Use the bolts and nuts provided in the kit. Tighten them securely with a wrench, but don't over - tighten as it might damage the parts.
Once the posts are attached, add the cross - beams and any other components. Make sure to use the level frequently to ensure that the structure is straight and level at all times.
Attaching the Pergola to the Stone Surface
After the pergola is fully assembled, carefully lift it into position over the marked anchor points. Align the holes in the base plates of the pergola with the stone anchors.
Insert the bolts through the holes in the base plates and into the stone anchors. Tighten the nuts using a wrench. This will secure the pergola to the stone surface. Check again with the level to make sure the pergola is still straight and adjust if necessary.

Optional Add - ons
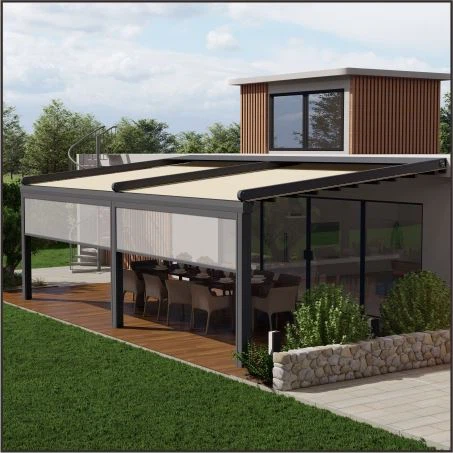
If you want to take your pergola to the next level, we offer some great add - ons. For example, our Motorized Pergola System for Restaurant is perfect if you want to easily adjust the angle of the louvers. It's not only convenient but also adds a modern touch to your outdoor space.
The RGB Light Pergola is another cool option. You can set the mood with different colors of light, making your evenings under the pergola even more enjoyable.
And if you're looking for a DIY - friendly option, our Louvered Roof Pergola Kits come with everything you need to build your own louvered roof pergola.
Final Checks
Once the pergola is installed and any add - ons are in place, do a final check. Walk around the pergola and make sure all the connections are tight. Give the structure a gentle shake to check for any signs of instability.
Inspect the louvers (if your pergola has them) to ensure they open and close smoothly. Check the lights (if you installed the RGB lights) to make sure they're working properly.
Contact Us for Your Purchase
If you're interested in our snow - resistant pergolas or any of the add - on options, don't hesitate to contact us. We're here to answer all your questions and help you find the perfect pergola for your needs. Whether you're a homeowner looking to enhance your backyard or a business owner in need of a pergola for your restaurant, we've got you covered.
References
- General construction knowledge and experience in the pergola industry.
- Manufacturer's installation manuals for snow - resistant pergolas.